Приглашаем посетить
Добычин (dobychin.lit-info.ru)

Styling the Container

Previous Page
Table of Contents
Next Page

Styling the Container

Now that the <body> element has been styled, all content will be centered on the page. This can be overcome by setting the container to text-align: left.

For browsers that support auto margins, the correct centering method is then applied: margin: 0 auto.

The container can be set to a width of 700px. This width can be changed to suit your needs.

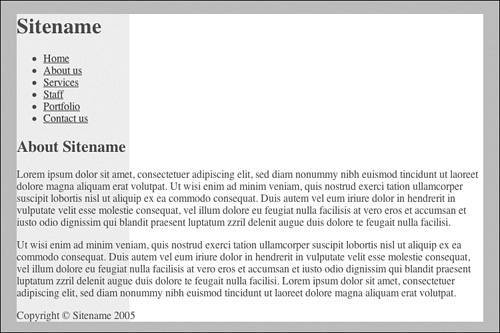
Finally, the container must be set with a background image using background: #FFF url(header-base.gif) repeat-y; as shown in Listing 19.4.

The background image can be seen in Figure 19.2 and the results are shown in Figure 19.3.

Figure 19.2. Background image used for container.

Styling the Container


Figure 19.3. Screenshot of styled container.
Styling the Container


Creating the Illusion of Column Colors

Styling the Container

One problem with floating containers is that they will generally only extend to the depth of their content. If one column is much shorter than another, it can be very hard to create columns using background colors alone.


So, how do you get the shorter column's background color to extend to the bottom of the page?

One simple solution is to use a background image that gives the illusion of column colors. This image can be added to the overall container as a background image and repeated down the y axis.

The floated containers then sit over the top of this repeated image, and the colors will extend to the bottom of the page, no matter which column is longer.


Listing 19.4. CSS Code for Styling the Container
body
{
    text-align: center;
    background: #B0BFC2;
    color: #444;
}

#container
{
    text-align: left;
    margin: 0 auto;
    width: 700px;
    background: #FFF url(header-base.gif) repeat-y;
}


Previous Page
Table of Contents
Next Page